Custom Containers (Apptainer)
Building Custom Containers
While many packages can be installed in a Mamba environment, not everything can easily installed that way. Sometimes you want a system level package instead, or you need a library or tool that isn’t available to Mamba but is present in the system repositories (or externally). Or perhaps you have a pre-built binary that runs on a different Linux distribution than the one running on the cluster. This is where building your own container can be utilized.
You have two options for creating your container, extend one of the pre-built containers just customizing it as needed, or build your own from scratch. Extending requires the least effort, but will not fit all use cases. Creating a container from scratch offers the most flexibility, but can also take a long time to troubleshoot build and run-time issues – it’s not for the faint of heart!
Extending Existing Containers
It’s possible to build an Apptainer container from a node in the cluster, which comes in handy when you just want to extend the functionality of an existing container. A container consists of layers that can be stacked on top of each other, you can easily extend either the default or remote desktop container with your customizations. The downside to this layering approach is that the containers can get quite large, and take a while to build.
The following example extends the minimal container, which is
available pre-built in the cluster. The .def file that this
container was built with is presented below in the section Building
Containers From Scratch, as an example of building your own container
from scratch.
 1Bootstrap: localimage
 2From: /cluster/share/singularity/minimal.sif
 3
 4%post
 5  # Update the DNF repository cache so we can install packages
 6  dnf --refresh makecache && \
 7
 8  # Install the cowsay package
 9  dnf install -y cowsay && \
10
11  # Cleanup the cache to save space before we compress the image
12  dnf -y clean all && \
13  rm -rf /var/cache/dnf /var/cache/yum
14
15%labels
16  Author Zach McGrew <mcgrewz@wwu.edu>
17  Version v0.0.1
18
19%help
20  This container is designed to demonstrate extending the default
21  JupyterHub container.
Save the above script to a directory where you have plenty of space to
work, as you will be generating a large file (This is example will use
about 475MB) when the build completes. Building the image is done with
the apptainer build command. For additional information
about the build sub-command, please see the full Apptainer
documentation.
Note
The example build session below forces the build process (
-F ). If you don’t force the build you will get warning
messages about the help and label sections. By forcing the build,
the labels ( apptainer inspect ) and the run-time help
message ( apptainer run-help ) are correctly set.
Warning
The “Verifying bootstrap image” section of the build can take
multiple minutes to pull the container image from the file server
and verify that it’s correct. If you extend the
remote-desktop.sif, or remote-desktop-gpu.sif it can take
upwards of five (5) minutes for this stage of the build alone.
The final compression stage of “Creating SIF file…” can also take a very long time. It’s best to request as many CPUs as you can in your HTCondor job to help with this, so it can utilize as many cores as possible. Requesting at least 8 CPUs is a good starting point to build the example here in less than 10 minutes.
USER@c-X-X:~/apptainer_jupyterhub_extend$ apptainer build -F cowsay.sif cowsay.def
INFO: User not listed in /etc/subuid, trying root-mapped namespace
INFO: The %post section will be run under fakeroot
INFO: Starting build...
INFO: Verifying bootstrap image /cluster/share/singularity/minimal.sif
INFO: Running post scriptlet
+ dnf --refresh makecache
Rocky Linux 8 - AppStream 2.4 MB/s | 11 MB 00:04
Rocky Linux 8 - BaseOS 983 kB/s | 7.1 MB 00:07
Rocky Linux 8 - Extras 42 kB/s | 14 kB 00:00
Rocky Linux 8 - PowerTools 1.5 MB/s | 2.7 MB 00:01
Extra Packages for Enterprise Linux 8 - x86_64 4.5 MB/s | 16 MB 00:03
Metadata cache created.
+ dnf install -y cowsay
Last metadata expiration check: 0:00:06 ago on Fri Mar 1 22:45:29 2024.
Dependencies resolved.
================================================================================
Package Architecture Version Repository Size
================================================================================
Installing:
cowsay noarch 3.7.0-10.el8 epel 47 k
Transaction Summary
================================================================================
Install 1 Package
Total download size: 47 k
Installed size: 72 k
Downloading Packages:
cowsay-3.7.0-10.el8.noarch.rpm 57 kB/s | 47 kB 00:00
--------------------------------------------------------------------------------
Total 39 kB/s | 47 kB 00:01
Running transaction check
Transaction check succeeded.
Running transaction test
Transaction test succeeded.
Running transaction
Preparing : 1/1
Installing : cowsay-3.7.0-10.el8.noarch 1/1
Running scriptlet: cowsay-3.7.0-10.el8.noarch 1/1
Verifying : cowsay-3.7.0-10.el8.noarch 1/1
Installed:
cowsay-3.7.0-10.el8.noarch
Complete!
+ dnf -y clean all
46 files removed
+ rm -rf /var/cache/dnf /var/cache/yum
INFO: Adding help info
INFO: Adding labels
INFO: Creating SIF file...
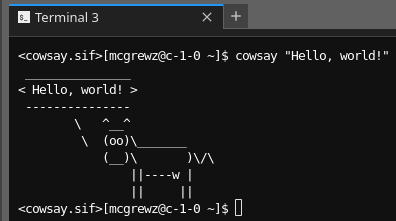
INFO: Build complete: cowsay.sif
As shown above, there is a newly created cowsay.sif file in the directory you’re currently in. Make note of this directory, it will be specifying it as the custom location when starting the JupyterLab server via JupyterHub. An easy way to get this path is to use the pwd command to print the working directory. See the section Using Custom Containers for running below.
Building Containers From Scratch
Building a container from scratch requires more effort, but allows for
maximum customization. It can also be difficult to troubleshoot. Be
prepared to spend lots of time reading through the Jupyter error
messages logged in your ~/.jupyterhub.condor.err and
~/.jupyterhub.condor.out after attempting to start the Jupyter
server.
There are a handful of packages, and a few directories that must be created in order to run a custom container. These are detailed in the note below.
Note
These packages are required for JupyterLab to start via HTCondor:
jupyterhub >= 4.1.4
notebook >= 4
jupyterlab >= 4
nodejs
batchspawner >= 1.3
To get access to the normal cluster file server and local scratch space you should pre-create the following directories to ensure they can be properly mounted inside the container when it starts:
/cluster
/scratch
/scratch_memory_backed
What follows is the full source for minimal.def, which was used to
build minimal.sif that was extended in the example above. This is
also the base container for the Default environment, which is then
extended again via the Remote Desktop environments. If you would
like to see the source for those files, please contact us via the
Support page.
The minimal.def file below has comments on each section of code
that it’s executing. Strictly speaking, not every one of the packages
that are installed are required, but they make the container much more
functional, without making the size grow too much.
  1Bootstrap: docker
  2From: rockylinux/rockylinux:9.5.20241118
  3
  4%files
  5  conda2kern /usr/bin/
  6  mamba2kern /usr/bin/
  7
  8%post
  9  # Variabless to make updates easier
 10  MINIFORGE_VERSION="24.11.3-0"
 11  PANDOC_VERSION="3.6.2"
 12
 13  # Ensure UTF-8 for build time
 14  export LC_ALL="C.UTF-8"
 15  export LANG="C.UTF-8"
 16
 17  # Base update, various commmon repos
 18  dnf -y --refresh upgrade && \
 19  dnf -y install epel-release && \
 20  dnf --enablerepo=epel group && \
 21  dnf config-manager --set-enabled crb && \
 22  dnf config-manager --set-enabled appstream && \
 23  dnf -y --refresh upgrade && \
 24
 25  # Basic packages that are nice to have
 26  dnf -y install \
 27      tar \
 28      xz \
 29      gzip \
 30      bzip2 \
 31      git \
 32      zip \
 33      unzip \
 34      wget \
 35      findutils \
 36      which \
 37      bash-completion \
 38      less \
 39      htop \
 40      man-db \
 41      man-pages \
 42      tmux && \
 43
 44  # Setup directories for our cluster environment
 45  mkdir /cluster /scratch /scratch_memory_backed && \
 46
 47  # pandoc (From GitHub -- Not currently available in repos)
 48  curl -qsLLo /tmp/pandoc.tar.gz https://github.com/jgm/pandoc/releases/download/${PANDOC_VERSION}/pandoc-${PANDOC_VERSION}-linux-amd64.tar.gz && \
 49  tar -C /usr/ -xzf /tmp/pandoc.tar.gz pandoc-${PANDOC_VERSION}/bin && \
 50  rm /tmp/pandoc.tar.gz && \
 51
 52  # Miniforge
 53  curl -qsLLo /tmp/miniforge.sh \
 54       "https://github.com/conda-forge/miniforge/releases/download/${MINIFORGE_VERSION}/Miniforge3-${MINIFORGE_VERSION}-Linux-x86_64.sh" && \
 55  bash /tmp/miniforge.sh -b -p /opt/miniforge && \
 56  rm /tmp/miniforge.sh && \
 57  export PATH="/opt/miniforge/bin:${PATH}" && \
 58
 59  # Update Mamba first
 60  mamba update --all && \
 61
 62  # Mamba Jupyter packages
 63  mamba install -y jupyterhub && \
 64  mamba install -y notebook && \
 65  mamba install -y jupyterlab && \
 66  mamba install -y jupyter-resource-usage && \
 67  mamba install -y nbgitpuller && \
 68  mamba install -y ipywidgets && \
 69  mamba install -y batchspawner && \
 70  mamba install -y nodejs && \
 71  mamba install -y python-lsp-server && \
 72
 73  # Pip packages
 74
 75  # Final cleanup
 76  python3 -m pip cache purge && \
 77  mamba clean -ity && \
 78  dnf -y clean all && \
 79  rm -rf /var/cache/dnf /var/cache/yum && \
 80
 81  # Fix $PATH -- $SINGULARITYENV_PATH overrwrites ALL of our settings without this
 82  echo 'export PATH="/opt/miniforge/bin:${PATH}:/bin:/sbin:/usr/bin:/usr/sbin:/usr/local/bin:/usr/local/sbin"' >> /.singularity.d/env/999-zzz.sh && \
 83  chmod 755 /.singularity.d/env/999-zzz.sh && \
 84
 85  # Fix $PS1 prompt
 86  echo 'export PS1="<${APPTAINER_NAME}>[\u@\h \W]\$ "' >> /.singularity.d/env/999-zzz.sh && \
 87  chmod 755 /.singularity.d/env/999-zzz.sh
 88
 89%environment
 90  export PATH="/opt/miniforge/bin:${PATH}:/usr/local/bin"
 91  export LC_ALL="C.UTF-8"
 92  export LANG="C.UTF-8"
 93  export SING_USER_DEFINED_PREPEND_PATH="/opt/miniforge/bin"
 94
 95%labels
 96  Author Zach McGrew <mcgrewz@wwu.edu>
 97  Version v0.0.1
 98
 99%help
100  This container is designed to support the JupyterLab environment.
In the above minimal.def there is a local file included,
conda2kern. This script is explained in the Custom
Environments page, but is also
included here for those curious as to how the script works. Feel free
to include this in your container to continue making new environments
easier.
  1#!/bin/sh
  2
  3while getopts 'd:hn:pr' opt ; do
  4    case $opt in
  5      h|\?)
  6        echo "Usage: $0 [-d <display name>] [-n <kernel name>] [-h]"
  7        echo "-h:                Display this help message"
  8        echo "-d <display name>: The display name"
  9        echo "-n <kernel name>:  The kernel name"
 10        echo "-p:                Force Python environment"
 11        echo "-r:                Force R environment"
 12        exit 0
 13        ;;
 14      d)
 15        dname="$OPTARG"
 16        ;;
 17      n)
 18        name="$OPTARG"
 19        ;;
 20      p)
 21        force_env="python"
 22        ;;
 23      r)
 24        force_env="r"
 25        ;;
 26    esac
 27done
 28
 29if [ -z "$name" ] ; then
 30  name="$CONDA_DEFAULT_ENV"
 31fi
 32
 33if [ -z "$dname" ] ; then
 34  dname="$CONDA_DEFAULT_ENV"
 35fi
 36
 37KERNEL=~/.local/share/jupyter/kernels/"${name}"/kernel.json
 38
 39if [ ! -e "${KERNEL}" ] ; then
 40  case $force_env in
 41    python)
 42      # Check if ipykernel is installed yet, of we need to install it
 43      if ! conda list ipykernel | awk '$1 ~ /ipykernel/ {found=1} END {exit !found;}' ; then
 44        conda install -c conda-forge -y ipykernel
 45      fi
 46      ;;
 47    r)
 48      # Check if r-irkernel is installed yet, of we need to install it
 49      if ! conda list r-irkernel | awk '$1 ~ /r-irkernel/ {found=1} END {exit !found;}' ; then
 50        conda install -c conda-forge -y r-irkernel r-essentials
 51      fi
 52      ;;
 53    *)
 54      # Environment not forced, try and detect it
 55      if conda list r-essentials | awk '$1 ~ /r-base/ {found=1} END {exit !found;}' ; then
 56        force_env="r"
 57      elif conda list ipykernel | awk '$1 ~ /ipykernel/ {found=1} END {exit !found;}' ; then
 58        force_env="python"
 59      else
 60        echo "r-essentials package not installed, and ipykernel package is not installed."
 61        echo "Unable to determine which kernel type to install."
 62        echo "Please re-run this script with either -r or -p to specify which one you want."
 63        exit 1
 64      fi
 65      ;;
 66  esac
 67
 68  # Actually install the kernel now
 69  case $force_env in
 70    python)
 71      python -m ipykernel install --user --name "$name" --display-name "$dname" || exit 1
 72      ;;
 73    r)
 74      Rscript -e "IRkernel::installspec(name = '$name', displayname = '$dname')" || exit 1
 75      ;;
 76    *)
 77      echo "There was an unhandled error trying to install the kernel."
 78      echo "You should not see this message on your terminal. Ever."
 79      exit 1
 80      ;;
 81  esac
 82fi
 83
 84# Should the environment be fixed? Or will it be added?
 85! grep -q '"env":' "${KERNEL}"
 86fixEnv="$?"
 87
 88# Insert or modify the env section to include the needed CONDA_* and PATH variables
 89awk -v fixEnv="$fixEnv" -v CONDA_PREFIX="$CONDA_PREFIX" -v CONDA_DEFAULT_ENV="$CONDA_DEFAULT_ENV" -v PATH="$PATH" '
 90
 91function conda_prefix() { print "  \"CONDA_PREFIX\": \"" CONDA_PREFIX "\","; }
 92
 93function conda_default_env() { print "  \"CONDA_DEFAULT_ENV\": \"" CONDA_DEFAULT_ENV "\","; }
 94
 95function path() {
 96  #PATH is special. Prepend our new bin directory, cleanup anything else...
 97  split(PATH, spath, /:/);
 98  npath=CONDA_PREFIX "/bin";
 99  seenp[npath] = 1;
100  for (p in spath) {
101    if (! (spath[p] in seenp)) {
102      seenp[spath[p]] = 1;
103      npath = npath ":" spath[p];
104    }
105  }
106  print "  \"PATH\": \"" npath "\","
107}
108
109# If we find an existing ENV section, only replace some variables
110/"env": \{/ { inEnv = 1; print "Fixing existing env section..." | "cat 1>&2"; }
111
112# If in the env section, only replace these lines
113inEnv && /CONDA_PREFIX/ { conda_prefix(); next; }
114inEnv && /CONDA_DEFAULT_ENV/ { conda_default_env(); next; }
115inEnv && /PATH/ { path(); next; }
116inEnv && /},/ { inEnv = 0; }
117
118# Normally we print every line we see
119{print $0;}
120
121# Not in the env section, but found a closing array section
122# Build the env section here
123!fixEnv && /\],/ {
124  print "Inserting custom env section..." | "cat 1>&2";
125  print " \"env\": {";
126  conda_prefix();
127  conda_default_env();
128  path();
129  print " },"
130  #No longer in the environment section
131  inEnv = 0;
132}
133' "$KERNEL" > "${KERNEL}.swp"
134
135# https://unix.stackexchange.com/questions/485004/remove-trailing-commas-from-invalid-json-to-make-it-valid
136# Modified to preserve whitespace before '}'
137sed -i.bak ':begin;$!N;s/,\n\(\s*\)}/\n\1}/g;tbegin;P;D' "${KERNEL}.swp"
138
139mv "${KERNEL}" "${KERNEL}.BAK"
140mv "${KERNEL}.swp" "${KERNEL}"
Using Custom Containers
In order to use your custom environment, you need to do set two options:
-
Select “custom” for the environment drop down choice

-
Specify the path to the container to run

On the Server Options page the section Extra HTCondor options at the bottom allows you to specify additional options to be passed to the HTCondor scheduler. We can use this field to specify that we want to run a custom image instead of the default.
+SingularityImage="/cluster/research-groups/researcher_lastname/containers/my_cool_container.sif"
This allows you to specify which image to start on the execute point in the cluster. Make sure it has the required packages mentioned above in the Building Containers From Scratch section. If you extended the minimal or one of the other pre-built containers the required packages will already be installed.